Dual Barcodes on Supplement Labels: Approve the Checkout Pair
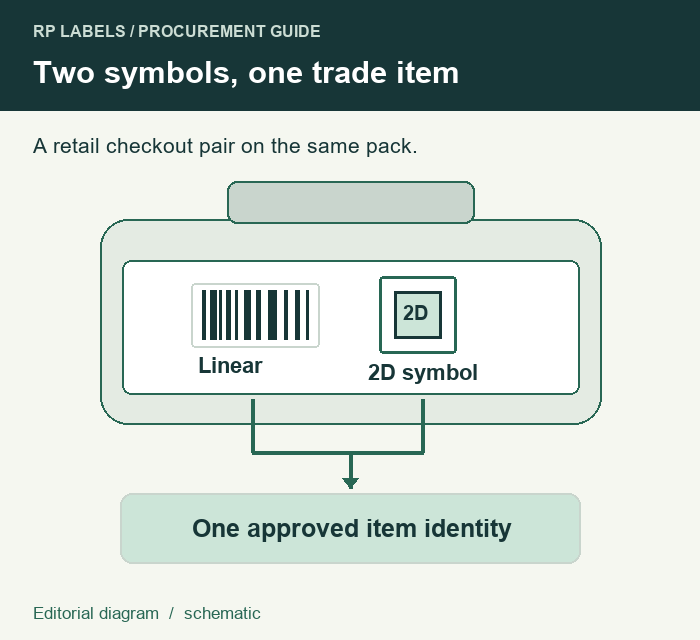
When a retailer asks for both a linear barcode and a 2D barcode for checkout, give the designer one approved trade-item identity and one agreed placement plan for the finished bottle. Confirm which symbol types the retailer accepts and what its checkout system should do when both are read. Keep that decision with the artwork revision before ordering labels.
Identify which two symbols the retailer intends to read
A checkout pair may combine a current EAN or UPC with a supported 2D symbol during a transition. Both should identify the same trade item in this use case. A QR code intended only for consumer engagement may have a different placement and a different acceptance check. If the brief just says “add a QR,” ask the retail or master-data owner to identify the intended application, syntax and approved data.
The GS1 retail point-of-sale implementation guideline describes dual marking, consumer engagement and how scanner software associates multiple reads with one trade item. For an overview of separate scan jobs, use the supplement barcode and QR guide.
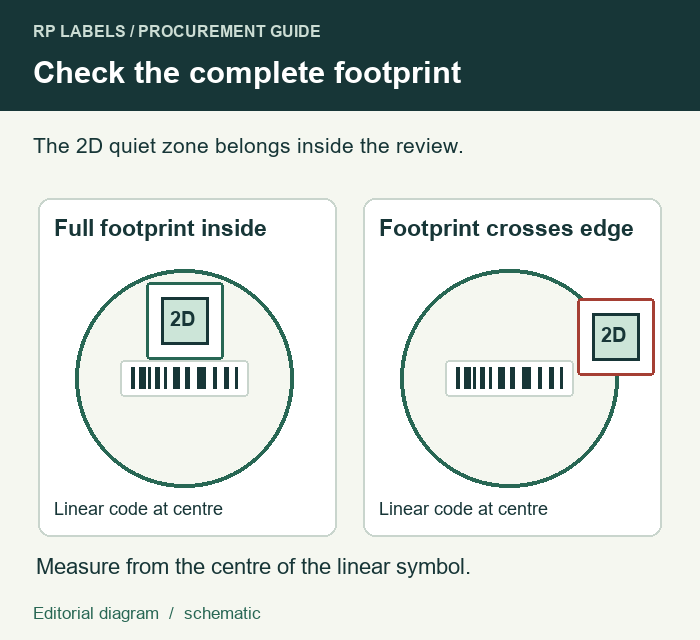
Use the whole 2D symbol when reviewing placement
The GS1 General Specifications, release 26.0 recommend that the complete 2D symbol, including its quiet zones, fall within a 50 mm radius measured from the centre of the linear symbol when both are used for retail POS. Review the relevant placement and symbol rules for the application with the retail partner. The recommendation concerns the complete 2D footprint. Measuring between the centres alone can hide a part of that footprint outside the intended area.
On the flat dieline, indicate the nominal size and protected background for both codes. Review a printed and applied sample on the real container so the owner can see the seam, taper, decoration and actual presentation at checkout. If the pair will not fit, review the available panel and layout with the retail owner. The team may move decorative elements or change the panel arrangement. Get approval before reducing a symbol or its clear space.
Return three pieces of evidence for the same artwork
- Have the master-data owner decode each symbol and compare its identifier with the assigned SKU and retail item record. Confirm how the same identifier is represented in each encoding, including any leading zeros required by that syntax.
- Have the print team identify the sample and verification scope for each printed symbol. Record the symbol, substrate, finish, specimen state and report reference. The barcode verification guide explains what the report covers.
- Have the retail or test-system owner check the actual scan behavior for the intended reader setup. Confirm that the expected item is processed once when both symbols are captured. Record the result and any unresolved scanner or system limitations.
A proof that decodes to two different item records needs a data correction. A pair with acceptable print evidence but unexpected checkout behavior needs the retail system owner. Route those issues to the correct owner before asking the printer for a production release.
Send a single dual-marking brief
Prepare an inquiry for RP Labels with the bottle, dieline, approved source files, per-design quantity, the two symbol types, the placement drawing and the person responsible for the checkout test. Ask what printed sample and finish can be quoted against that artwork. Keep the retailer’s acceptance with the job so a later SKU or material change can be checked against it.