Supplement Labels and Shrink Bands: Review the Assembly Order Before Setting Clearance
The body label clears the shoulder in the sample photograph. The closure band also fits on the bottle. Then the packer assembles the full package and the band's lower edge approaches the label's upper edge.
That hypothetical conflict cannot be settled by approving the two components separately. The useful purchase decision is whether the body label and closure band can coexist through the actual assembly and opening sequence. A gap on an empty, unassembled bottle is only part of that evidence.
Ask the packing owner to show the proposed sequence and identify the point at which each clearance is checked. Keep the bottle, closure, band and body-label references together so a component change does not silently inherit the previous approval.
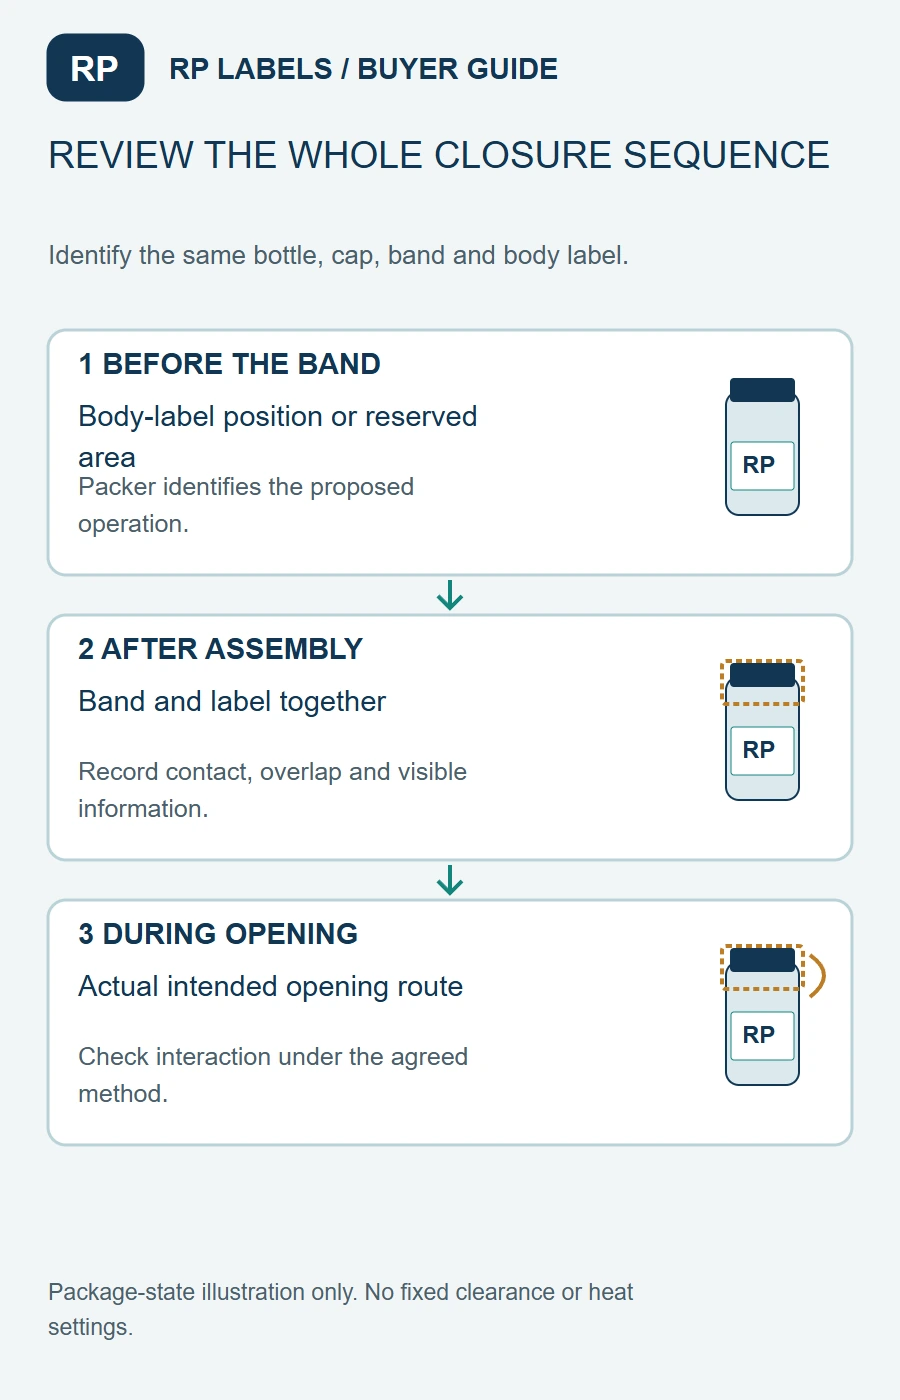
Assembly-review illustration. No heat settings, minimum gap, opening performance or tested package is represented.
Begin with the assembly that will actually be made
Identify the bottle and cap, the intended closure band, and the body label's finished dimensions and construction. Ask whether the label is applied before or after the band operation and how the bottle is handled between them. The equipment owner should supply the actual process requirements.
Do not infer a working clearance from the bottle's nominal volume or cap diameter. Locate the usable wall on the actual container and identify the band area after application. A larger cap or a replacement bottle can change that relationship even when the label PDF remains unchanged.
Glassnow's band application guide describes placing a band over the closure and applying the appropriate process for that component. It supports reviewing the assembled closure rather than an isolated label. Its instructions and product performance do not establish an RP process setting or an approved gap for this supplement pack.
Review three states instead of one photograph
First review the body-label position on the identified container at the relevant assembly stage. Check which edge and viewing area must remain available. If the label is applied later, the earlier sample should still identify the reserved location rather than imply that an unapplied label has passed a fit check.
Second review the completed band and label together. Record visible contact, overlap or interference where relevant, plus whether the required opening cue and information remain accessible. A neat band alone is not evidence that the neighboring label was unaffected by the operation.
Third review the intended opening action under a method agreed by the package owner. Does the band removal or tear route approach the body label, conceal a relevant cue or make required identity harder to see? An observation at this stage should be recorded separately from the appearance of the unopened pack.
These are proposed review states, not proof that a band meets any regulatory tamper-evidence requirement. The responsible product and regulatory owners determine the actual requirements and evidence for the item and market.
Keep geometry and process questions distinguishable
If the label enters the shoulder or base curve before the band is applied, begin with the body-label geometry. Changing the band cannot create a larger straight wall. The bottle-size guide addresses that measurement brief.
If an acceptable body-label position becomes problematic only after the closure operation, ask the packer and component suppliers to review the sequence, component references and observed contact. A photo of a wrinkle does not establish whether heat, mechanical contact, placement or another factor caused it.
Record who will investigate and which controlled comparison is proposed. This article supplies no heater distance, temperature, dwell time or machinery adjustment. Those belong to the qualified equipment and component owners for the actual process.
Give both proposed routes a fair comparison
One project may apply the body label after the closure-band operation to suit its process. Another may require a different sequence because of its equipment or handling arrangement. Neither order should be approved from a general internet preference.
Where the packer can consider alternatives, compare what each one changes: access to the label panel, placement control, contact with fixtures, information visibility and the required sample evidence. Ask which route the supplier can actually support before pricing a label as if every sequence were interchangeable.
The simpler decision may be a smaller body-label height that leaves the necessary operating area. Another buyer may need that height for readable approved copy and should discuss a different packaging arrangement. Do not buy a larger label to solve a typography problem while leaving the closure interaction unresolved.
Record the approved component combination
The worked assembly record lists the pre-band, assembled and opening-review states of a fictional package. All observations remain open. The blank record and field guide link the references, operation owner, observation, evidence and disposition.
Retain the reviewed photographs and relevant measurements with the accepted combination. If the cap, band, bottle, body-label size or operation changes, identify which states need review again. “Same bottle size” is not enough to establish that the prior combination still applies.
Keep other closure components within their own scope. A neck band, an induction liner and a side label do not automatically perform the same task. Use the neck-seal and body-label guide when deciding which component is meant to do which job.
For custom supplement labels, send RP Labels the complete closure-and-label brief, actual component references, body-label artwork, quantities and the packer's proposed sequence. Ask for a label proposal that names the unresolved clearance questions. The approval should describe an identifiable assembled package, not two attractive components that have never met.