3 mL Vial Label Size: The Bottle Still Needs Measurements.
Imagine the artwork is ready and the bottles are the last purchase to settle. Two suppliers both list a 3 mL vial. One has stock now. Swapping bottles looks like an easy way to keep the project moving.
I would hold the label dimensions open until an actual bottle arrives. Capacity tells you what the container holds. It does not tell the printer where a rectangular label can sit.
A nominal capacity such as 10 ml does not define the label size. Measure the bottle. Squeeze-tube measurement is on the bottle label size guide and the tapered jar guide.
The expensive part of guessing is that the artwork may still look perfectly reasonable on screen. The closing edges only collide, or the top edge reaches the shoulder, when somebody wraps the print around the glass.
Choose the vial label size from the measured application area, then approve the artwork on that bottle. A capacity chart can help you start a conversation. It cannot approve the fit.
What size label fits a 3 mL vial? There is no single size that fits every vial sold under that capacity. For a straight cylindrical wall, start with the measured circumference minus the planned closing gap for width, and usable wall height minus the chosen top and bottom clearances for height. Confirm the proposed outline at actual size on your identified vial. The two-bottle example below shows why the container reference matters.
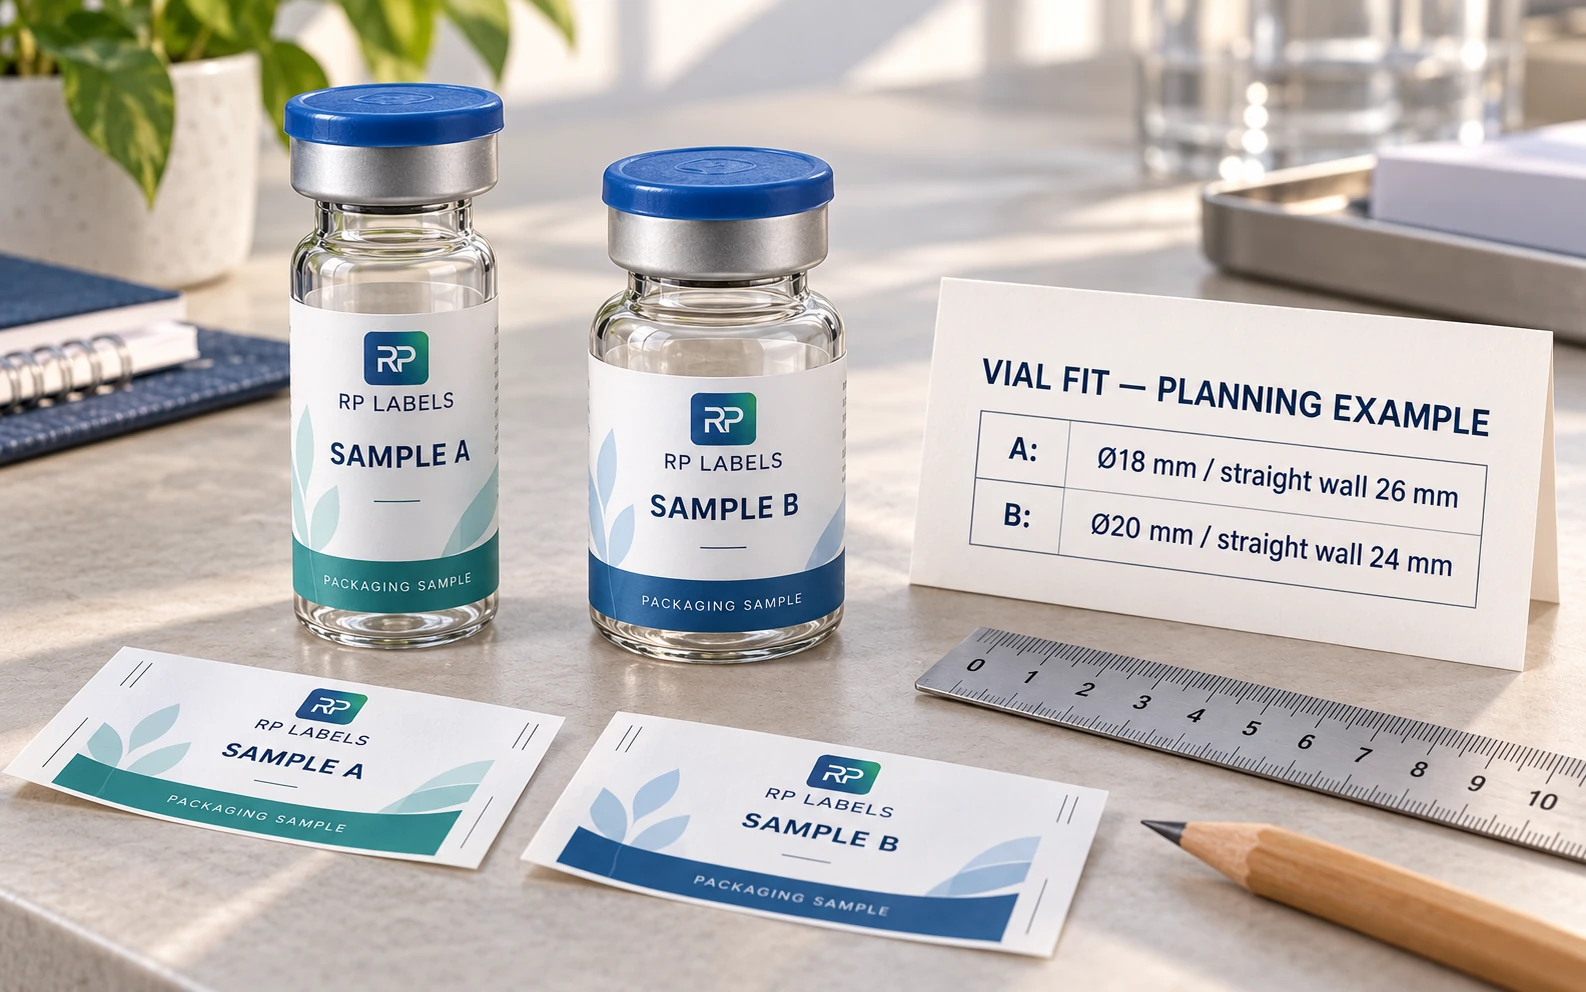
AI-generated packaging illustration. Vials A and B and all dimensions are planning examples, not standard 3 mL specifications, production measurements or an approved customer order. The image is not a scale drawing.
Keep the bottle identity on the measurement sheet
A photo named “small vial” is an awkward reference once a second supplier joins the conversation. Record the supplier, item number, closure and sample reference before measuring. Give the physical sample and its measurement sheet the same ID.
If purchasing changes the bottle source, the packaging owner should be able to see which fit approval needs checking. Otherwise the designer may keep working from the original drawing while the person ordering containers assumes that the replacement is equivalent.
There is a fair exception. If the new shipment is the same approved container specification, with an applicable incoming-check record, a team may already have a controlled way to confirm it. That is different from accepting an unfamiliar bottle because its nominal capacity matches.
The useful question is what identifies the approved container, and what evidence connects the bottle in your hand to it.
Measure the part the label will actually touch
Start with the usable straight wall between the shoulder and the heel. Measure at the intended application position, allowing for features such as a recessed area or molded seam. The label should not depend on perfect placement to avoid a curve.
Then measure the circumference around that same position with a level paper strip or flexible measure. For a genuinely cylindrical section, diameter multiplied by pi provides a cross-check. If the wrap measurement disagrees, investigate the measuring line or bottle shape before using the formula to settle the argument.
That is why I would keep the measured circumference and the calculated starting width in separate fields. One describes the container. The other includes your proposed gap or overlap.
Here is an explicit two-bottle planning example. Suppose both are offered under the same nominal capacity description, but Sample A has an 18 mm outside diameter and 26 mm usable straight wall. Sample B has a 20 mm diameter and 24 mm straight wall. Assume a proposed 2 mm closing gap and 2 mm clearance at each horizontal edge.
| Planning input or result | Sample A | Sample B |
|---|---|---|
| Outside diameter | 18 mm | 20 mm |
| Usable straight wall | 26 mm | 24 mm |
| Calculated circumference | 56.55 mm | 62.83 mm |
| Proposed label width: circumference minus 2 mm | 54.55 mm | 60.83 mm |
| Proposed label height: straight wall minus 4 mm | 22 mm | 20 mm |
These are starting dimensions, not cut-size approval. If you reused A's proposed wrap on B, the calculated closing gap would grow to about 8.28 mm. The result might still be acceptable, but you would have a different amount of exposed glass and a different layout around the vial.
Now you have something specific to decide. Keep one narrower label if the resulting gap and information layout work on both bottles, or use separate dimensions if the packaging requirement needs them. A shared size can simplify stock and artwork control. It deserves to win when the applied samples support it.
Put the paper mockup where the operator will put the label
Print the proposed outline at actual size, with page scaling disabled. Check a known reference length on the print before cutting it out. A mockup printed at “fit to page” can quietly undo careful measurements.
Wrap it on the identified sample in the intended position. Check the top and bottom edges, the closing gap and where the main identity sits when the vial is held normally. A loose paper mockup establishes a first geometry check; it does not prove adhesive performance or finished-material behavior.
Ask the person responsible for application to repeat the placement. If the fit only works when the designer spends a minute adjusting each edge, that is useful information before a larger order. For machine application, have the operator confirm the relevant placement and roll requirements rather than treating a hand-held mockup as line approval.
Next use an appropriate physical label sample when the construction or application makes it necessary. A PDF can confirm the intended artwork dimensions. It cannot demonstrate how the chosen film and adhesive behave on the actual vial.
If the required copy cannot remain readable in the usable space, bring that problem back to the content owner. Simply making every line smaller may make the outline fit while leaving the packaging difficult to use. The supplier can discuss layout options; required wording still needs the buyer's proper approval.
Give the printer a fit decision it can work from
The worked vial measurement sheet preserves Sample A and B as examples. Use the blank sheet to record your own container IDs, wrap measurements, proposed dimensions and approval evidence. The filling guide explains which fields the buyer, application owner and printer need to confirm.
Keep the actual measured result alongside the proposal. If the printer recommends a different gap, radius or finished size, record the revised dimension and check the updated outline before approval. Do not let the measurement sheet become an old attachment that no longer matches the released artwork.
For an existing custom vial label project, send the container reference, diameter or measured circumference, usable height, proposed gap, required fields, application method and quantity per design through the label project contact page. The quote planner can help organize those inputs. Leave unknown dimensions marked for confirmation.
If the bottle supplier changes while the designer is still working, put the replacement beside the approved sample. Measure first. The two catalog listings may both say 3 mL; the label only gets to fit the glass that arrives.