A stand-up supplement pouch looks like a broad, flat canvas in an artwork file. The real pack has a zipper, tear notch, heat-sealed edges and a bottom gusset. A pressure-sensitive label placed too high can bridge the zipper; one placed too low can fold under the pouch when it stands. The usable reading area is smaller than the silhouette.
I would make the buyer choose the packaging route first. Is this a separately printed label applied to a plain pouch, or is the pouch itself being printed? The materials and production controls differ. This guide deals with a custom applied label. It should not be mistaken for a universal flexible-packaging dieline.
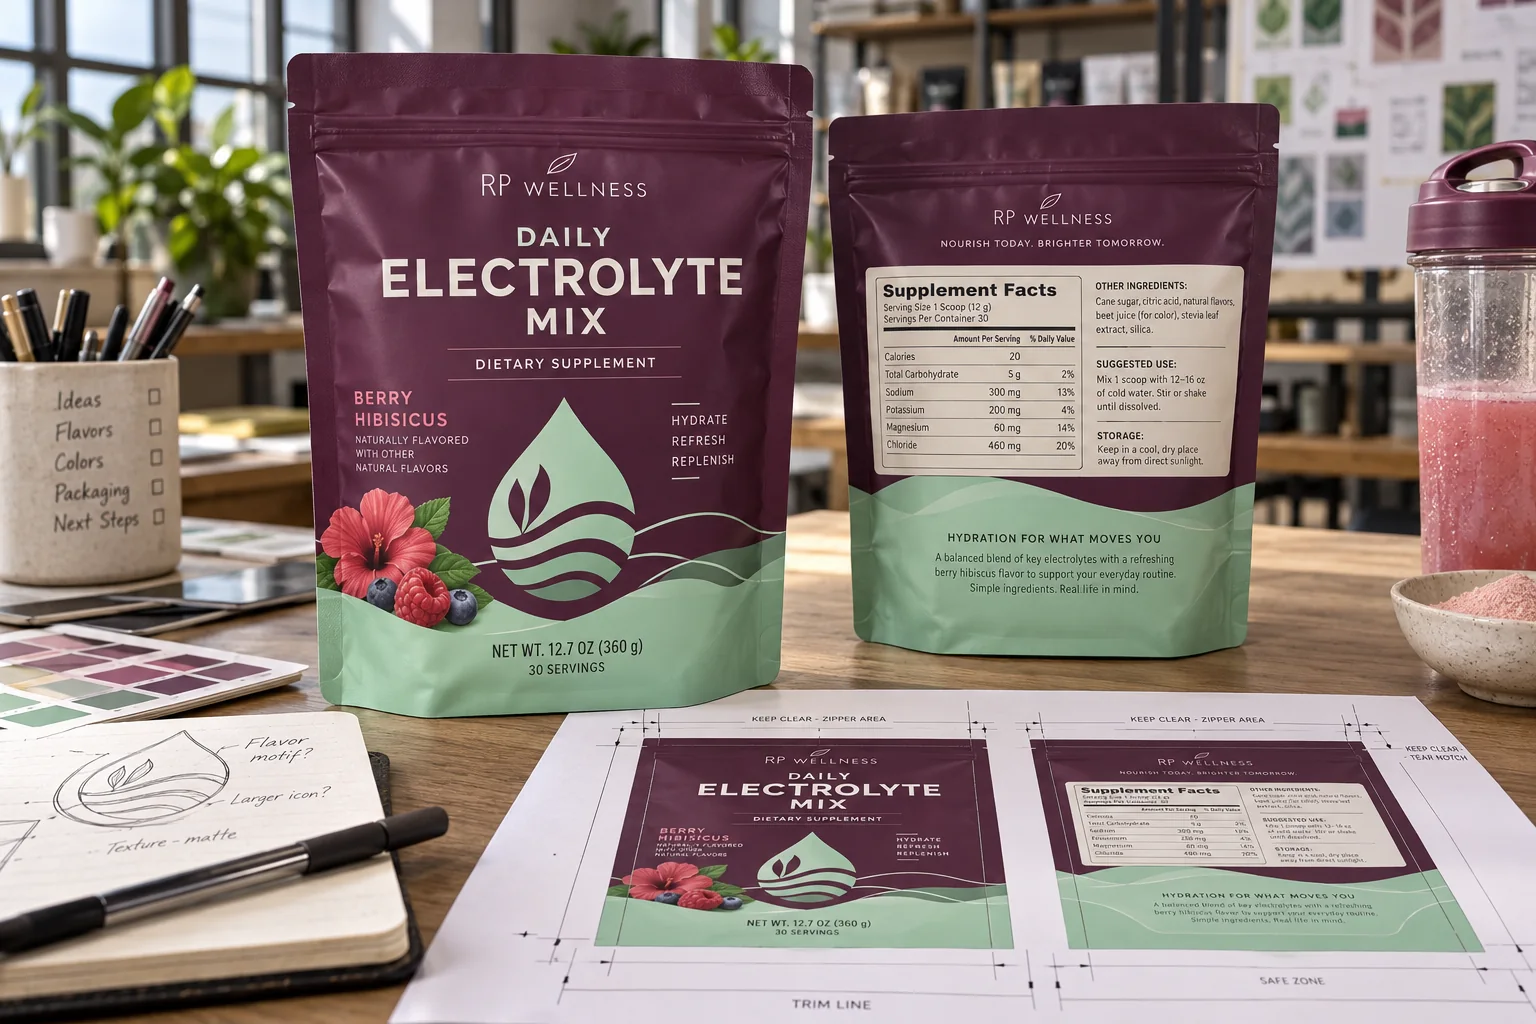
Reserve the opening and seal zones before placing copy
Get a filled sample pouch from the intended supplier. Mark the tear notch, zipper track, top heat seal, side seams and bottom gusset while the pouch is upright. Open and close it normally. That tells the artwork team which areas wrinkle, flex or disappear from view. A label should not stop a customer from gripping the zipper, and its adhesive should not be assumed to bond across every film fold.
HERMA's flexible-bag example treats product and closure labels as different jobs and notes that uneven surfaces affect adhesive choice. That is useful context, not a guarantee that a particular construction is suitable for every supplement pouch. The supplier must test the actual film, fill and application conditions.
Give required statements a readable home
For a U.S. dietary supplement, FDA's Chapter I guide describes required statements and the principal-display and information panels. Chapter IV describes the Supplement Facts presentation and any applicable special provisions. The responsible brand must approve its formula copy and legal placement. A printer can reserve space and reproduce approved copy; it cannot certify an invented nutrition panel.
Keep the statement of identity and net quantity on the intended front display. Put the Facts panel and other approved information in a zone that stays flat enough to read when the pouch is filled. Leave breathing room from the side seal and gusset. If the contents cause a pronounced bulge, prove the label on a pouch filled to the actual volume rather than on an empty flat bag.
Test how the label moves with the pouch
Apply a production-representative sample and handle it as a consumer would: pick up from the top, open the tear notch, use the zipper and stand it on a shelf. Inspect whether the label curls, forms bubbles, obscures the opening or creases through small text. If a code is included, scan the applied filled pouch from normal angles; a flat proof does not validate a code on a flexible surface.
Try more than one filled pouch. The first may be relatively flat while a fuller sample rounds out the front and pulls the side seals into a different position. Photograph the label before filling, after filling and after a normal open-close cycle. If it lifts only after filling, the issue may be pouch movement or placement rather than print quality. Ask whether the line applies the label before or after filling, since that changes what the applicator and adhesive actually encounter.
The photograph here is fictional RP Wellness sample artwork. Its claims, ingredients and quantities are not an approved supplement formula. For a useful quote, send filled and empty pouches, film construction if known, exact artwork and brand-approved copy, intended label size, placement tolerance, application method and expected storage conditions. Request an applied proof before bulk ordering.
Sources and scope
Reviewed October 4, 2026. The primary references linked below support the identified technical points. Buying scenarios and inspection checklists are editorial guidance, not RP production records, certification, legal approval or universal acceptance standards. Demand layer: competitor and process pages linked here, including Avery, HERMA or OnlineLabels where cited, illustrate buyer language and process topics only. They do not supply RP minimum quantities, lead times, prices, certifications or materials. Authority layer: an RP number is backed only by a factory datasheet, a signed quote or proforma, confirmed product data, or a fact kept on the About page. The March 2026 proforma there is one production-run example, not a standing offer. RP shipping and planning pages describe what to confirm on a quote. Worked figures on this page are fictional unless an authority source is named for them.