Hologram Label Shapes: Quote Geometry and Placement Together
A circle, a rectangle and a bridge can share the same holographic design. They cannot share an approval just because the artwork matches. Put each outline on the package before comparing what the die cut costs.
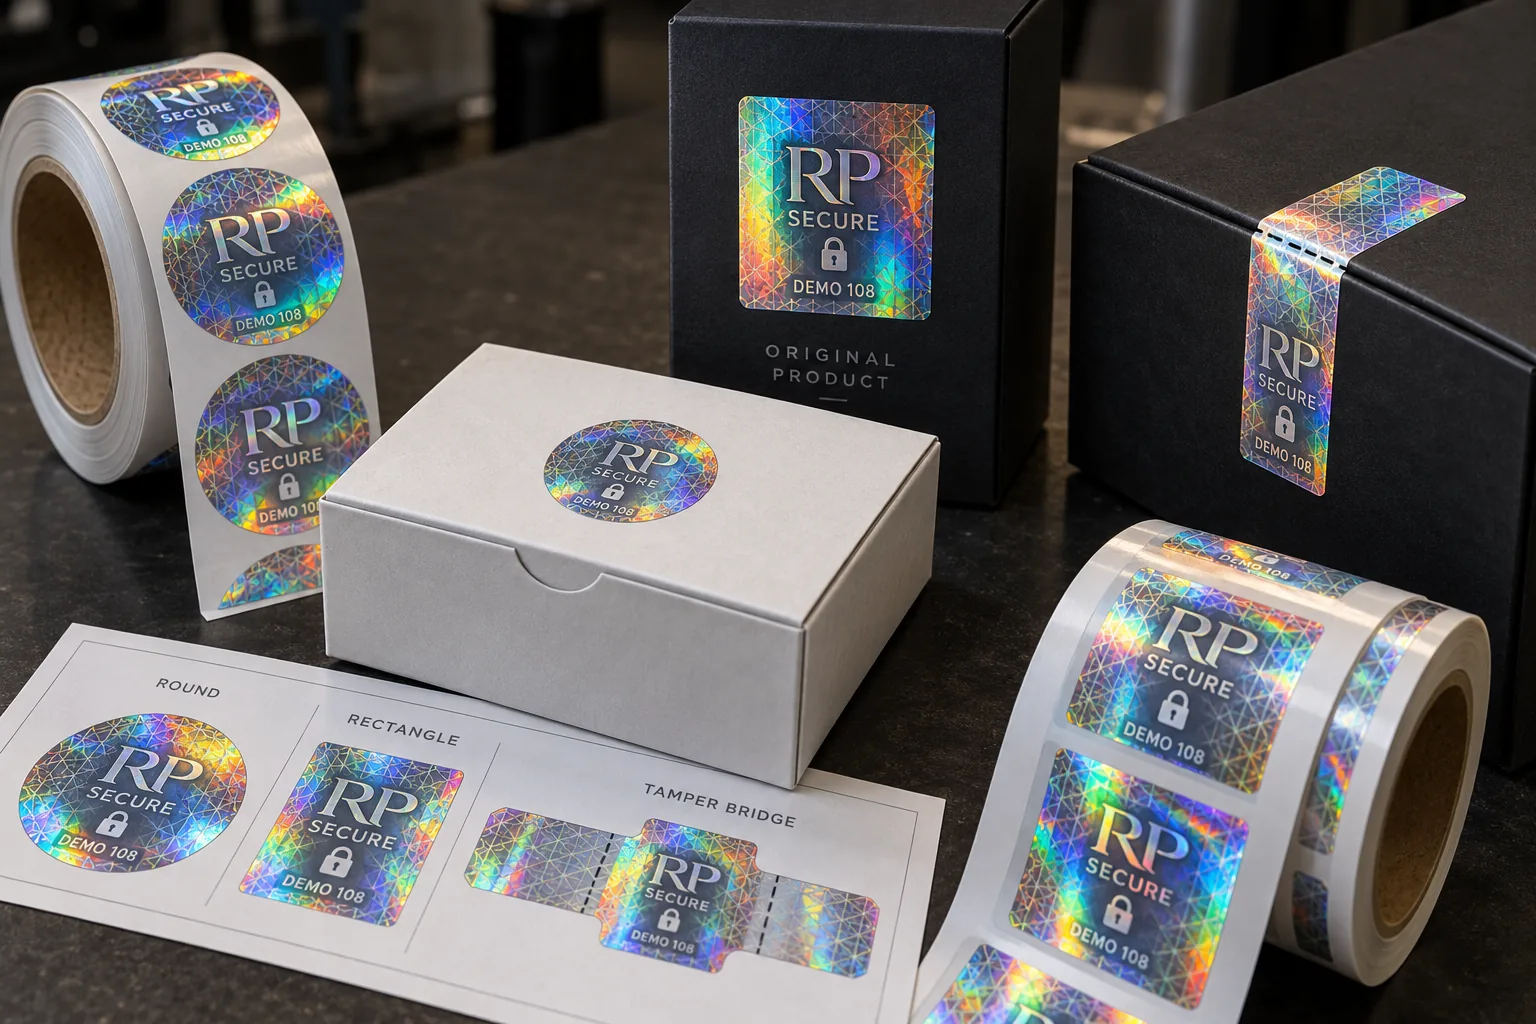
Consider a hypothetical brief with three placements: a circular mark on a carton top, a rectangular front panel and a bridge across the opening. Similar optical artwork does not establish that the same die cut will serve all three.
Put the placed outline into the quotation record
Draw the proposed cut on a marked package photograph or use an actual-size paper outline. Record the width, height or diameter with the cut revision, not simply 'small round' or 'long seal.' Show which area remains available for the brand mark after corners, folds or an opening joint are considered. The nominal outside dimensions are not automatically a usable rectangle for artwork.
For a round mark, identify the flat placement and the information that must fit inside it. For a rectangle, show corner clearance and the surface curve. For a bridge, mark both landing areas and the joint they cross. These are different quotation inputs even when all three use the same graphic. Ask the converter which shape details require a revised die or a dispensing trial.
The worksheet's comparison rows intentionally stop short of declaring one shape safer. A round mark can be the simple choice for recognition on a flat panel. A rectangle may offer better room for a wordmark or reference. A bridge is appropriate only when its placement and construction address the opening job; length alone does not create that function.
If a supplier recommends changing corner radius, end-tab width or another part of the outline, keep that revision visible to the artwork owner. Review where the protected graphic and any information move. A die-cut adjustment can make an intricate shape more practical, but the original visual proof should not silently approve the revised outline.
After the outline is settled, confirm whether the proposed sheet or roll format lets the packing team pick and place it. Keep the first-opening trial separate from this geometry handoff and link to it if a seal function is required. Send RP the marked placement, cut revision, package surface, quantity and application route. The quote should describe a shape in use, not three attractive loose stickers with the same name.
Download the worked example CSV · Open the working CSV · Read the field guide. The entries are planning examples, not completed results.
Use a round seal for a flat, simple placement
A circular label can read as a compact approval or brand marker and avoids pointed corners on a flat surface. It still needs a sensible diameter, sufficient print area and a place where the operator can reach it. On a carton top, check whether stacking or a warehouse label will cover it. If the seal only decorates the closed carton and never crosses an opening joint, do not call it tamper evidence. It is a visible brand or security-style element, not an opening indicator.
For the visual role, decide what the customer should recognize first: the RP mark, a serial number, or a custom pattern. If everything becomes microscopic to fit the circle, a larger rectangle may be the honest answer.
Choose a rectangle for more legible information
A rectangle can carry a longer brand name, batch reference or structured graphic. Its corners, however, may be more exposed to catching on a rough package or during handling. Ask the converter for an appropriate corner radius and a physical die-cut sample. Avery Dennison's converting guidance explains why die cutting, matrix removal and label geometry matter in pressure-sensitive production. It is not a promise that a specific holographic stock will run on your applicator.
If the rectangle is placed on a curved bottle, proof it on that bottle rather than borrowing a flat-carton approval. The same art can fail at a tighter radius or where a seam ends on a shoulder. Our placement guide covers that separate decision.
A bridge must cross the real opening path
A tamper bridge is not just a longer decorative sticker. It must sit across the part that separates when the carton or lid opens. If its center misses the joint, or if the box can be opened from another side, the intended evidence can be bypassed by ordinary opening. Map the entire closure before deciding the strip width, perforation, end tabs and adhesive area on each surface. A small change to the carton flap can move the opening path.
HERMA discusses labels with a closure function, which supports treating closure as a distinct construction requirement. It does not establish that every holographic bridge shows damage after removal. Ask for a real closed-pack sample and test the intended first opening, reclosure attempt, storage handling and any transport scuff. Compare the resulting evidence to a written buyer acceptance criterion. See our tear-path proof guide for that exercise.
Quote the application format, not only the artwork
State whether labels are applied by hand, from a dispenser or on an automatic line. Give roll direction, core, maximum outer diameter, label gap and sensor requirements if machinery is involved. Shape affects how readily a thin foil label stays on its liner and how cleanly the matrix is stripped. I would ask for a small production-like roll and test dispensing before committing to a large run. Do not assume the material used for a rectangular front-panel label can be converted into an intricate bridge at the same yield.
Send three marked package photos, exact substrate samples, desired placement dimensions, closure sequence, quantity and an explanation of what each label is meant to achieve. Round for simple top recognition, rectangle for more design space, bridge for an opening function only after physical validation. Comparing custom and stock holograms is useful, but the correct shape is the first specification I would settle.
Bring the decision into your print brief
Use the identified references and open items in the worked record when discussing your custom print project. Include the actual package, artwork revision, quantity per design and the conditions explained above; leave unknown inputs marked for confirmation. Review the relevant custom-label service, then send the project details to RP Labels.
Related buying decisions
- Where to Place Hologram Security Seals: Carton, Cap or Bottle?
- Perforated Carton Seals: Compare Planned Opening with Accidental Damage
- Hologram Seals Across Bottle Caps: Qualify Both Ends of the Bridge
Sources and scope
Reviewed October 25, 2026. Primary supplier or official reference supports the identified production concept. Procurement comparisons and worksheets are editorial guidance. Conditional examples are not customer records, completed tests, regulatory approval or universal acceptance standards. Confirm the actual proposed construction and process with the responsible supplier and buyer. Demand layer: competitor and process pages linked here, including Avery, HERMA or OnlineLabels where cited, illustrate buyer language and process topics only. They do not supply RP minimum quantities, lead times, prices, certifications or materials. Authority layer: an RP number is backed only by a factory datasheet, a signed quote or proforma, confirmed product data, or a fact kept on the About page. The March 2026 proforma there is one production-run example, not a standing offer. RP shipping and planning pages describe what to confirm on a quote. Worked figures on this page are fictional unless an authority source is named for them.